Showing posts with label yeast. Show all posts

9 September 2012

Marzipan Twist - 'Marzipanzopf'


After a fairly long break I am back and ready to do more baking. We spent an excellent couple of weeks hiking and climbing in the Bavarian/Austrian Alps, mostly in a region called the Allgäu and Tirol. This is one of my favourite holiday destinations, partially because it is connected with a lot of childhood memories and family holidays, but also because the hiking and mountaineering there is amazing. It is a bit touristy, but not too crowded and it is absolutely beautiful. Our base was a sweet little town called Oberstdorf and we also spent a few days in the more famous Garmisch-Partenkirchen. Now I am back in the somewhat less scenic East Midlands (bless!) and slowly getting used to staring at a computer screen again for the majority of my waking hours... From experience I know that in a couple of weeks (or even days) it will feel like I have never even been away, but for the time being a bit of comfort food is called for. My holiday inspired me to bake and cook some regional specialties, such as Apfelstrudel and Germknödel. But the first ‘welcome back’ recipe is a sweet bread filled with marzipan and nuts. The thought of having this for breakfast always helps me get up early in the morning. The recipe makes one large loaf, which also freezes well.

For the bread dough:
500 g plain flour
20 g fresh yeast (or one sachet dry)
250 ml milk
1 egg
60 g butter

For the filling:
200 g marzipan
200 g ground almonds
2 tablespoons amaretto
4 tablespoons crème fraiche
1 egg
1 tablespoon cocoa powder (for colour, optional)

To brush before baking:
1 egg yolk and 2 tablespoons of milk

Put the flour in a bowl. Dissolve the yeast in the lukewarm milk and pour on top of the flour. Leave for about 20 minutes. Now add the egg and the melted butter and knead until you have a smooth ball of dough (you can add a bit more flour if it is too sticky, but not too much!). Leave to rise in a bowl covered with a dish towel for about 30 minutes or until it has visibly increased in size. Stretch and fold the dough and leave to rise again.

 
In the meantime, make the filling. Mix all the ingredients well (I put everything in a food processor and whizzed it until I had a sticky paste). Put aside until the dough is ready.
Roll out the dough to a square about 40 x 40 cm and then cut it in half. Add half of the filling each in a strip down the middle of both rectangles and then fold over the dough from both sides to get two long sausage shapes. 
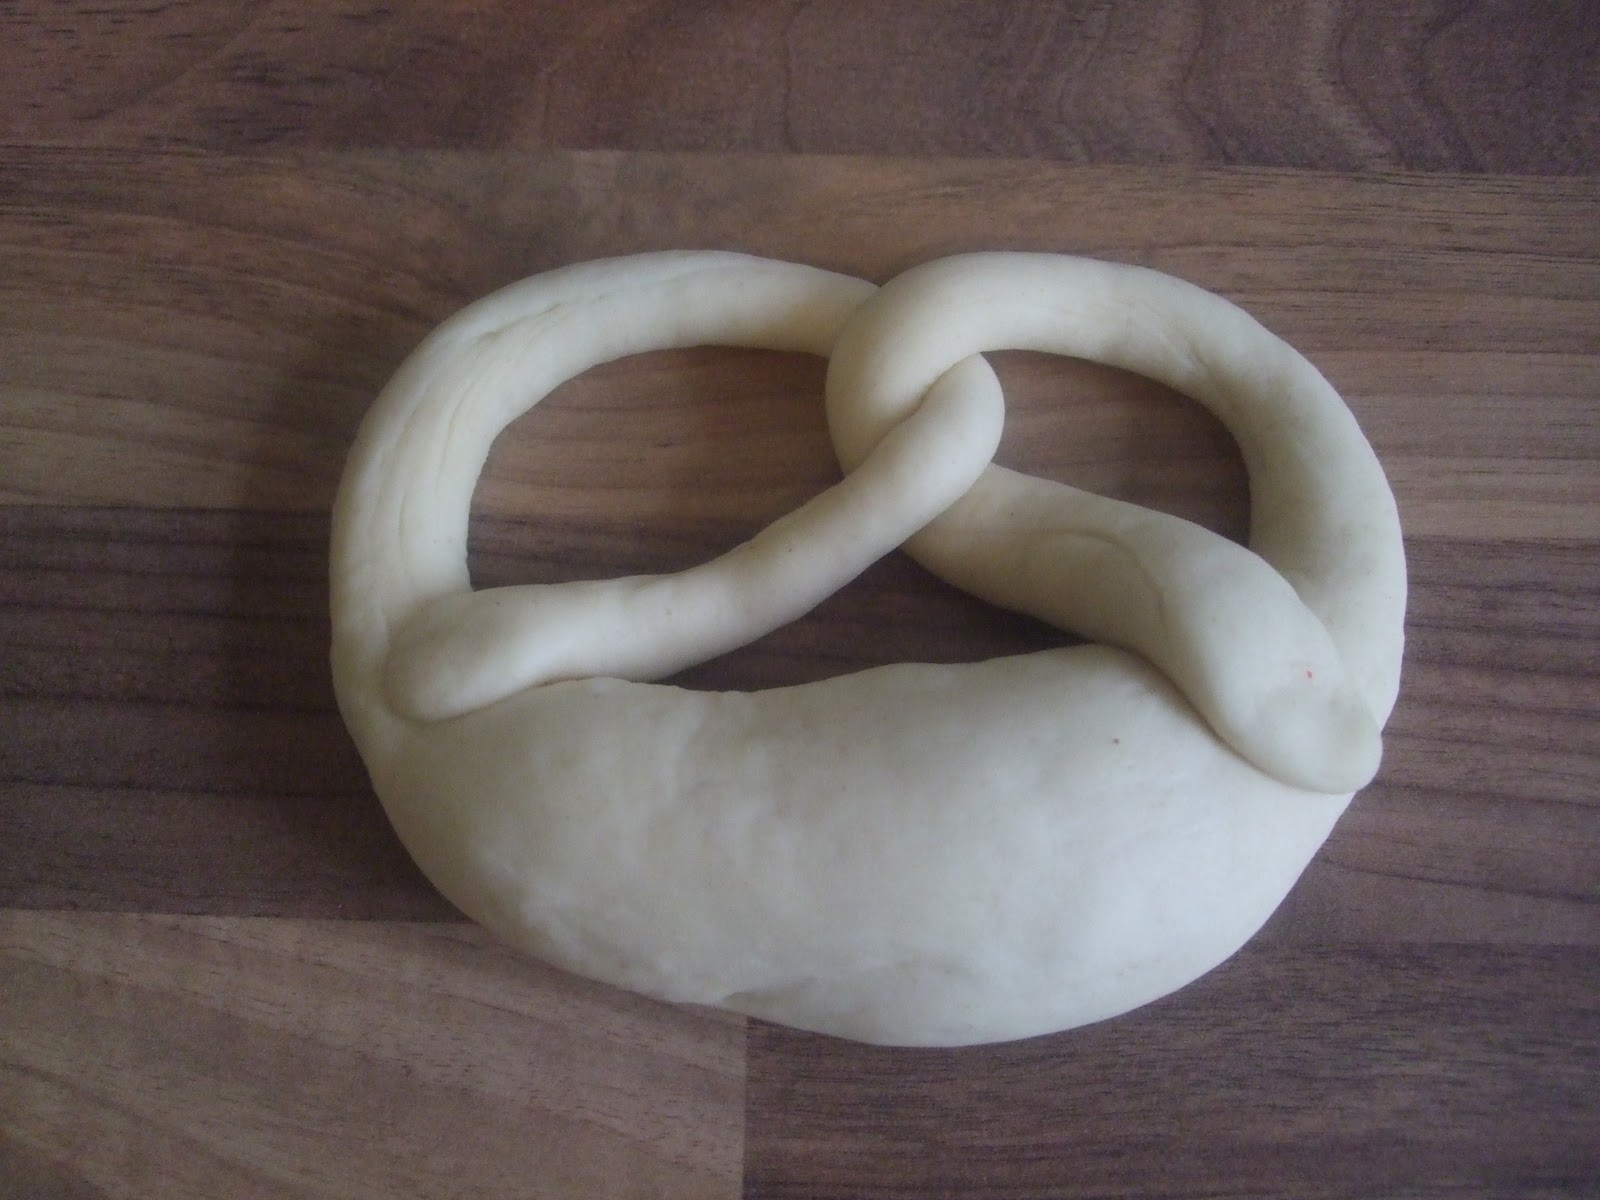
Twist the two sausage shapes around each other and put on a baking tray covered in baking paper. Leave to rise while you preheat the oven to about 200 degrees. When the oven is hot brush the bread with the egg and milk mixture and bake for about 40 minutes.  


29 July 2012

Swabian Farm Loaf – “Eingnetztes”


‘Eingnetzes’ is a crusty wheat bread typical for the region of Swabia. The dough is relatively soft and it is left to rise in the mixing bowl. The loaf is baked without a tin so its shape varies from time to time. As its surface is not cut before it is put into the oven it rips open at one side, forming a characteristic 'knobbly bit' (called Knauzen in Swabian). The Knauzen is particularly crusty and is seen by many as the best bit of the bread! The word ‘Eingnetztes’ derives from the German verb ‘benetzen’, which translates as ‘to wet’ or ‘to dampen’. This makes sense, because the bread is lifted onto the baking stone or hot baking sheet with wet hands. It is also brushed with some more water for the last few minutes, which gives the loaf its typical shiny crust. Traditionally, the dough was turned out directly onto the stone oven from a wet bowl or large ladle.

The bread is fairly easy to make but the main issue is getting hold of the right flour. Before I started getting into baking ‘serious’ bread I tended to use only plain wheat flour and in some instances wholemeal wheat flour. In Germany the types of flour sold differ considerable from those available in the UK. The main difference – and most relevant for baking bread – is the availability of many different ‘flour types’ (Typen) in Germany. The lower the type number, the whiter the flour or, in other words, the higher the flour type number the more percentage of the whole grain is left in the flour. Regular UK plain flour corresponds roughly to the German flour Typ 405. For baking bread a higher and more rustic type of flour is usually used. Wheat flour used for baking non-wholemeal bread is usually Typ 1050 and rye flour Typ 1150. These are darker than plain white flour, but not as dark as wholemeal. Occasionally I ask visitors to bring me a few bags of Typen flour from Germany or I bring some back when I have been on a visit to Germany myself. However, I have found that a mix of plain and wholemeal flour available in the UK has given me more than acceptable results. All the breads posted in this blog, for example, were baked with regular plain and wholemeal flours.

If you can get your hands on Typen flour I suggest using a mix of Typ 1050 and wheat wholemeal flour. If not, just follow the recipe below. This makes one large loaf. The pre-dough and sourdough keep the bread fresher for longer and they also improve its flavour a lot. It takes a while to make, but it is certainly worth it!

For the pre-dough:

100 g plain flour
100 g wholemeal wheat flour
10 g fresh yeast
200 ml lukewarm water

For the sourdough:

100 g wholemeal rye flour
100 g lukewarm water
1 tablespoon rye sourdough starter

Other ingredients:

300 g plain flour
300 g wholemeal wheat flour
15 g salt
1 tablespoon honey
300 ml lukewarm water

For the pre-dough: dissolve the yeast in the lukewarm water and mix in the flour. Cover the bowl with clingfilm or a lid and leave to rest at room temperature for an hour and then in the fridge overnight or for about 12 hours. For the sourdough: mix all three ingredients, cover and leave to rest in a warm place (28 degrees are ideal – placing the sourdough in a coolbox with a warm hot water bottle works a treat!) overnight or for about 12 hours.

When you are ready to bake mix the pre-dough and sourdough with all the remaining ingredients and knead well for about 10 minutes. The dough is relatively soft (but nothing like as sticky as pure rye sourdough). Cover the bowl with clingfilm and leave to rest for about 30 minutes. When the 30 minutes are up fold the dough in the bowl. It is easiest to do this by moving your hand under the dough, grabbing a bit, pulling it up and folding it over. Do this about 4-5 times moving clockwise (or counter clockwise) around the bowl. Leave to rest again for 30 minutes, then fold again and leave to rest while you preheat the oven.

Preheat the oven to about 240 degrees. If you have a bread baking stone you should heat this up in the oven. If not, place a strong baking sheet in the oven to heat up. When the oven is hot take the ball of dough out of the bowl with very wet hands and place it on a chopping board covered in baking paper. Pull the loaf onto the hot baking stone or baking sheet with the paper and spray some water into the oven. Bake at 240 degrees for about 15 minutes then decrease the temperature gradually to 200 degrees. The bread needs to bake for about one hour. You can pull out the baking paper after 20 minutes so it doesn’t burn.

When the bread is done briefly take it out of the oven and wet it with water (you can use a brush or just your wet hands, if you are hard like me). Put it back into the hot oven for about 2 minutes. This makes the crust nice and shiny. Remove from the oven and leave to cool. This freezes very well.


For fun and a bit of blog networking I am submitting this post to Yeastspotting.


18 March 2012

Crumbly pastries – ‘Streuselküchle’


Streuselküchle are only one type of that great institution in the Swabian region of south-west Germany: Süsse Stückle, translated as ‘sweet pieces’. Süsse Stückle come in a large variety of shapes and flavours and they are sold in every bakery. Other typical examples of Süsse Stückle are the Swabian twirls and custard twirls I wrote about previously. The custom in most households in south-west Germany, I think, is to purchase Süsse Stückle in a bakery for afternoon coffee if there isn’t any time to bake a cake at home. At least this is what happened when I was a child. For some reason, I really felt like eating a Streuselküchle, or crumbly pastry, last night, but as I do not have access to a German bakery I had no choice but to make them myself. The Streuselküchle is an extremely popular example of the Süsse Stückle, consisting of a yeast-dough base and topped with buttery pastry crumble (it is also a rather unkind name for calling a spotty teenager). The recipe might sound a bit dry, but these pastries are delicious (especially fresh) with a cup of coffee. The trick is to cram as much crumble on each piece as you possibly can. Commercial bakeries these days all tend to cover the Streuselküchle (and indeed most other Süsse Stückle) with a thick layer of icing. For my liking this is too sweet and really not necessary. My father’s theory is that this is done only so the Streuselküchle can be sold for longer with ascorbic acid added to the icing as a preservative. He is probably right, so I tend to stick with the traditional version without the icing.

Variation and improvisation on the Streuselküchle, however, is very possible. The picture above shows the most basic version, consisting only of yeast dough and crumble. The picture below includes a thin layer of vanilla custard under the crumble (the same used in the custard twirl recipe) and I also added a few frozen raspberries. In summer, other soft fruit (especially apricots, red currants or blueberries) tastes excellent in these pastries, or a spoonful of jam can also be added.


This recipe makes about 16 Streuselküchle, about 10 cm each in diameter.

For the yeast-dough base:

200 ml warm milk
100g melted butter
20 g fresh yeast (or one sachet dry)
500 g plain flour
80 g sugar
1 egg

For the crumble topping:

170 g butter
150 g sugar
250 g plain flour
Seeds from one vanilla pod, or some vanilla extract:

Optional: vanilla custard (half the recipe of the ones used for the custard twirls is enough); berries or other soft fruit (frozen or tinned is fine).

Mix the warm milk with the melted butter and dissolve the yeast in this mixture. In a bowl, combine the flour with the sugar. Pour the milk mixture on top of the flour and leave the yeast to activate for about 30 minutes. Then add the egg and knead patiently until you have a soft ball of dough. If it is sticky after kneading for several minutes, add a bit more flour. Cover and leave to rise for about 1 hour. After one hour, stretch and fold the dough and leave to rest for another 30 minutes.

In the meantime, make the crumble. Combine all dry ingredients, add the soft butter (or melted butter) and mix until you have coarse crumbs.

Divide the yeast dough into about 16 pieces. Leave the pieces to rest for a couple of minutes, then roll out into round shapes. If you are making the plain Streuselküchle press a generous amount of crumble on top of the dough. Leave to rise for about 10 minutes then bake in the preheated oven at 200 degrees centigrade for about 20 minutes (the yeast dough should be nice and golden, the crumble topping still light). If you are using fruit or a custard filling add this before you put on the crumble. A spoonful of custard spread thinly on the dough is enough. Bake as above.

If you like it really sweet you can cover the Streuselküchle with icing (icing sugar mixed with a few spoons of water or lemon juice) when they have cooled down. The Streuselküchle should be eaten within a day or two, but they can also be frozen.

18 February 2012

Buttercake - 'Butterkuchen'


Buttercake, consisting of a fluffy yeast-dough base and topped with sweet and crunchy sliced almonds, is very traditional and often served with afternoon coffee or tea. If at all possible, the cake should be baked and eaten on the same day and it tastes best when it is still a little bit warm. The cake is very simple and easy to make, but its flavour is very delicate and it is not too sweet. Some single cream or whipping cream is poured on the cake when it comes out of the oven, making it moist and enhancing the buttery flavour. I really recommend using fresh yeast for this, as the yeasty flavour is central to this cake and dry yeast just does not taste quite as good. I buy my fresh yeast in larger batches on ebay, where it is sold by a number of professional bakers in England. The yeast I received was always very fresh and of excellent quality and arrived within a day of buying it. I immediately cut it into 20g portions when it arrives, wrap it in tin foil and keep it in the freezer. 

This makes one square or rectangular cake of about 25 by 25 cm or 20 by 30 cm. It cuts into about 12 slices. The recipe can easily be doubled  for a larger cake tin.

For the dough:

250 g plain flour
60 g sugar (or more, if you like it sweeter)
20 g fresh yeast (or one sachet dry)
125 ml milk
1 egg yolk
30 g butter

For the topping:

50 g sliced almonds
50 g sugar
50 g butter, cut into small pieces
100 ml single or whipping cream

Combine the flour and the sugar. Dissolve the fresh yeast in the milk and pour on top of the flour. Leave to stand for about 20 minutes. Add the egg yolk and melted butter and knead for a few minutes until you have a soft and fluffy ball of dough (if using dry yeast, just combine all dough ingredients straight away). Cover and leave to rise for at least 1 hour or until doubled in size.

Roll out the dough to fit your baking tin or tray (this should be greased). Leave to rise again for about 30 minutes. Punch some holes in the dough with the handle of a wooden cooking spoon (or use your fingers). Top the cake first with the sliced almonds, sprinkle on the sugar and finish with the butter, cut into very small pieces. Bake at 180 degrees for about 25 minutes. If you use a cake tin with a loose bottom I recommend placing this in a baking tray to avoid melting butter dripping into the oven.


Remove the cake from the oven and carefully pour on the cream – I punch a few more holes in the cake before I do so, to ensure that the cream is absorbed into the cake. Leave to cool slightly and eat while still warm. 


30 January 2012

Custard twirls - 'Puddingschnecken'


These little pastries are sold in pretty much every bakery in Germany. They are a favourite for breakfast or with coffee or tea in the afternoon. Of course, variations of these twirls also seem to be a staple of the continental breakfast around the world. Very similar pastries can be found in a lot of other European countries and Germany certainly cannot claim copyright for this recipe. However, they are fairly traditional and certainly tasty enough to be included in this blog. In German these twirls have another strange name. Puddingschnecken literally translates as custard snails. But don’t let this put you off. The custard-type filling makes the twirls particularly moist and sumptuous. They are relatively easy to make and they freeze well and can be defrosted and reheated in the oven very quickly. The recipe below makes about 15 custard twirls.

For the dough:
500 g plain flour
20 g fresh yeast (or 1 sachet dry)
80 g sugar
Seeds from one vanilla pod
2 eggs
120 ml lukewarm milk
100 g melted butter

For the filling:
65 g corn flour
500 ml milk
80 g sugar
Seeds from one vanilla pod
100 g raisins soaked in rum (or apple juice)
 2 tbsp orange marmalade

Dissolve the yeast in the warm milk and mix with all the other dough ingredients. Knead thoroughly for about 10 minutes until you have a smooth and fluffy ball of dough. Put in a bowl, cover with a tea towel and leave to rise until it has roughly doubled in size.

In the meantime make the filling. Mix the corn flour with the sugar and vanilla seeds. Add about 80 ml of the milk and whisk well. Make sure there aren’t any lumps. Bring the rest of the milk to the boil. Add the corn flour mix and boil for about 1 minute, whisking continuously, until the custard has thickened. Leave to cool. I usually place some cling film on top of the custard to prevent a skin from forming. When the custard has cooled down (it can still be lukewarm) mix in the raisins.

Roll out the dough thinly into a rectangle of about 40 by 60 cm. Spread the custard mixture on top evenly and thinly. The filling should not be too thick or it will ooze out when rolling and cutting. Roll up from the shorter side of the rectangle. Cut carefully (I use a sharp serrated knife) into twirls about 2 cm thick. Place on a baking sheet lined with baking paper. Take care not to apply too much pressure when cutting, so the filling stays in place and the twirls keep their shape.


Bake in the preheated oven at 180 degrees for about 25 minutes (or until golden brown on top). In the meantime smooth the marmalade through a sieve and mix with a bit of warm water. Take the twirls out of the oven and brush with the marmalade whilst still hot. This gives them a nice shine. Eat within two days or freeze.


12 November 2011

Stollen bites with marzipan - 'Stollenkonfekt'


Yes, this is a Christmas recipe and no, it is not even the middle of November yet. However, these Stollen bites are not as premature as it might seem. Traditional Stollen needs to mature for 2-3 weeks until it has fully developed its flavour. Whilst these Stollen bites are not exactly traditional they also benefit from being hidden away in a tin for a few weeks. I baked them now so they will be ready to eat at the beginning of December. This is not a recipe for purists. Real Stollen is baked in large loaf shapes and not in gimmicky bite sizes. Moreover, marzipan or even double marzipan is not really a building block of the traditional German Christmas Stollen. Having said this, I prefer these bites to some of the more traditional renditions of the Stollen (which can be a bit dry sometimes). The bites are juicy and full of flavour and their small size means that they won’t spoil anybody’s appetite for all the other Christmas biscuits and cookies usually on offer. This recipe makes about 70 Stollen bites.

For the fruit mixture:

200 g raisins
80 g blanched almonds
Shot glass full of dark rum
50 g mixed peel

Mix the raisins and almonds with the rum. Leave to soak overnight or at least for 6 hours. Strain off any rum that has not been absorbed. Add the mixed peel and chop everything roughly in a food processor or with a knife.

For the dough:

500 g plain flour
50 g sugar
½ tsp salt
1 tsp cinnamon
A large pinch each of ground cloves and nutmeg
20 g fresh yeast (or one sachet dry)
130 ml warm milk

Mix the flour with the sugar, salt and spices. Dissolve the yeast in the warm milk and pour on top of the flour. Leave to stand for about 20 minutes or until the yeast has been activated.

For the marzipan mixture:

50 g marzipan
1-2 tbsp amaretto
200 g butter at room temperature
100 g icing sugar

Cut the marzipan into small pieces, add the amaretto and use an electric whisk to blend into a smooth paste. Add the butter and icing sugar and whisk until creamy.
Combine all three components (flour, fruit and marzipan mixtures) and knead for several minutes. The dough is fairly soft and sticky, some extra flour can be added if it is impossible to handle, but don’t add too much. Leave to rest and rise in a warm place for about 2 hours (it will not rise as much as bread dough).

For the marzipan filling (optional, but recommended):

150 g marzipan


Turn the dough onto a lightly floured work surface and roll into a sausage about 2-3 cm thick. Flatten into a rectangular strip of dough. Top this strip with small pieces of marzipan in intervals  of about 2-3 cm (see photo above). Fold one side of the dough over the marzipan pieces. Cut into chunks containing one ball of marzipan each.

Place on a baking sheet covered in baking paper and leave to rest for another 10 minutes or so. Bake for 15-20 minutes at about 190 degrees.


To finish:
200 g butter melted
1 pack of icing sugar


Dunk the baked Stollen bites into the melted butter as they come out of the oven (they have to be hot or at least warm).  Roll the bites in the icing sugar until they have a thick sugar covering. Leave to cool, store in tins (or in a few layers of aluminium foil) and hide. They will taste best if matured for 2-3 weeks.

5 November 2011

Swabian Twirls - Schneckennudeln


This is another traditional south-west German speciality with a silly name – translated literally these twirls are called ‘snail noodles’. (The epitome of silly names is the Swabian take on the doughnut, also called ‘nuns farts’ or Nonnenfürzle, but I’ll get back to this another time). The Schneckennudel makes a regular appearance at an old German ritual – Kaffee und Kuchen. Traditionalists observe Kaffee and Kuchen daily at about 3 pm. This includes vast amounts of hot drinks (coffee, of course, or tea if necessary) as well as a selection of cakes and pastries and gossip. An invitation to Kaffee und Kuchen is less formal than a dinner invitation and thus often extended to new acquaintances or to people you can’t face spending more than 2 hours with. Having said this, especially at weekends visitors often arrive in the afternoon for Kaffee and Kuchen to be followed by more food in the evening. When I was a child we had visits or visited relatives most weekends and usually this involved coffee and cake, followed by a few hours during which the adults chatted and the children made a huge mess in the garden or basement. Then dinner and the grand finale – disassembling the haunted houses/nomad tends/spaceships we had built, and tidying up the debris (usually by the mothers).

Working full time and living with somebody who does not fully appreciate this fine custom I rarely partake in Kaffee und Kuchen in the UK, but I still bake most weekends. In fact, I just finished baking these twirls and I will eat one with a coffee as soon as I have posted this post. Schneckennudeln can be found in every bakery in the south-west of Germany, but they are also easy to make at home. Traditionally they are filled only with melted butter, a mixture of sugar and cinnamon and raisins. However, as I don’t like raisins very much I prefer this nutty variant – baked with a mixture of hazelnuts and almonds in this recipe, but any combination of nuts will work. This recipe makes about 20 twirls, which can be frozen and reheated.

For the dough:

220 ml warm milk
100g melted butter
20 g fresh yeast (or one sachet dry)
500g plain flour
100g sugar
1 egg
1 tsp salt

For the filling:

200g ground nuts of choice
80 g sugar
1 shot dark rum or amaretto
1 tsp cinnamon
150 g double cream, whipped slightly
Some melted butter

Combine the warm milk and butter and dissolve the yeast in this mixture. In a large bowl combine the flour and sugar. Pour the warm milk mixture on top of the flour and leave to stand for about 30 minutes or until the yeast is activated and bubbling. Add the egg and salt and knead patiently until you have a ball of dough that is soft, but not sticky (add a bit of extra flour if required). Leave to rise for 1 hour. Stretch and fold the dough and leave to stand again for about 30 minutes.

In the meantime combine all ingredients for the filling – leave to stand at room temperature so all the liquid can be absorbed.


Roll the dough out in the shape a large rectangle – about 40 x 50 cm. Brush with melted butter then smooth the filling on top and roll up. Cut into pieces about 2-3 cm thick. I briefly freeze the dough before cutting as this helps the twists keep their shape more easily. Leave to rise for another 10 minutes or so then bake at 180 degrees for about 20 minutes.

30 October 2011

Butter crescents - “Butterhörnchen”


Once again I was unsure about how best to translate the name of these rolls. Literally, a Hörnchen is a small horn or ‘hornlet’, but this just doesn’t sound right. I considered calling them ‘German croissants’, too, but I did not want to risk breaking the European Union's Protected Geographical Status laws and they are also considerably easier to make. I love a good croissant and I am also partial to spending an entire day or even weekend testing complicated and time-consuming recipes. However, the time required to make real croissants is simply incompatible with a full-time job. Whilst these butter crescents are not quite as flaky and light as croissants they are the next best thing. They, too, take a while to make, but most of this time is required for the dough to rise and simply to sit in a warm place until it is ready to bake. They freeze very well and can just be defrosted and reheated in a warm oven for 10-15 minutes – they taste as good as fresh! 

There are a lot of different variants of the butter crescent available throughout Germany and this recipe with simple and buttery yeast dough is a popular version. I like the crescents plain so they can be teamed up with different toppings, but lots of variations are possible. They can be filled with jam, marzipan or with a piece of chocolate. For a savoury version I recommend sprinkling them with coarse sea salt or even with grated cheese. If you are in possession of food-grade caustic soda  for baking Pretzels you can use this to produce ‘Pretzel Crescents’ or ‘Laugenhörnchen’, which have become increasingly popular in Germany in recent years.

The recipe makes 12 crescents:

15 g fresh yeast (or one sachet dried)
1 tsp salt
300 ml warm milk
500 g plain flour
1 tbsp sugar
60g butter

Some melted butter (optional)
Some milk for brushing the crescents before baking

If you are using fresh yeast (recommended), add the yeast and salt to the warm milk, stir until dissolved, and leave to stand for about half an hour. If you use dry yeast just dissolve in the warm milk and salt – no waiting time required.

Mix the milk-yeast mixture with the flour and sugar. Leave to stand for 1-2 hours. Add the butter and knead the dough patiently (about 7 minutes in a food processor, longer by hand) until you have a smooth ball of dough that is not too sticky. Leave to rise for an hour. Stretch and fold the dough and leave to relax for about another hour.

Roll out the dough into a circle about ½ cm thick and leave to relax for a few minutes. Cut the circle into 12 slices like a pie and brush with the melted butter or top with topping, if using. Roll up into crescent shapes. Leave to rise for another 20 minutes or so then brush with some milk and bake at 220 degrees for 25-30 minutes or until they are as brown as you would like them to be.


16 October 2011

Sweet plaited bread - 'Hefezopf'


The Hefezopf (literally translated this means yeast plait) is another one of those bakery staples typical of south-west Germany, and of the region of Swabia – or Schwaben – in particular. To even call this a recipe seems kind of odd to me as it is just so basic. Every person growing up within an 80 km radius of Stuttgart can throw this together in their sleep from the age of three. I prefer having this slightly sweet and very good looking bread for breakfast, topped with butter and homemade jam or honey. I tend to make it for weekends or bank holidays, especially when friends or family are staying over and we have time to indulge in an extensive ‘continental’ breakfast. There are two basic variants of the Hefezopf: one with raisins and the other without. I am not a big fan of dried fruit, so I prefer the latter, but it is a matter of preference. Lately, I have given my Hefezopf a ‘British twist’, spicing it with some of the tasty ingredients used for hot cross buns. This is not traditional and therefore not suitable for purists, but I think it tastes great.

One slight drawback of baking a Hefezopf in the UK is the scarce availability of fresh yeast in regular supermarkets. Of course, this can also be baked with dried yeast, which I have tried. However, the fresh yeast taste is an important feature of this bread. I have been told that some British supermarkets sell fresh yeast and it can also be bought in some organic shops, especially in London. Unfortunately, I have never managed to find fresh yeast in shops that are in my vicinity. One way around this for me has been to buy yeast in bulk from a baker selling it on ebay (the price is very reasonable) and to freeze it in individual portions. Apparently, some traditional baking shops (if you can find one) are also willing to sell some fresh yeast if you ask nicely.

For one large plait:

20g fresh yeast (or 1 sachet dried)
500 g plain flour
250 ml lukewarm milk
1 egg
60 g butter
80 g sugar
1 tsp of salt
Finely grated zest of ½ organic lemon
A handful of raisins (optional) 


For a spiced version try a few of the following: infuse the milk with a pinch of saffron, a cinnamon stick, a cracked cardamom pod and/or a vanilla pod. Add a pinch of ground ginger, nutmeg and/or ground cloves.

Egg wash (one egg yolk mixed with a bit of milk to glaze the bread before baking)

Dissolve the yeast in the warm milk, add to all the other ingredients (apart from the egg wash) and knead until you have soft dough that is not too sticky. Cover in a bowl and leave in a warm place to rise until it has doubled in size. Divide the dough into three parts and roll each part into a string about 40 cm long and plait. Place on a baking sheet covered in baking paper and leave to rise again for about 20-30 minutes.  Mix an egg yolk with a dash of milk and brush this onto the bread (this will give it a nice shine). Bake at 200 degrees for about 40 minutes, or until the bread is a nice golden colour and sounds hollow when the bottom is tapped.

1 October 2011

Swabian Poor Souls – ‘Schwäbische Seelen’


There are several theories regarding the origin of this bread’s strange name: Seelen, translated as poor souls. It appears to be of a religious nature and linked to All Souls’ Day, a commemoration day met on 2nd November in the Catholic Church calendar. In the region of Swabia food, including Seelen bread, was given as a symbolic offering tothe  poor souls in purgatory, because congregations believed that this would bring them a rich harvest in the following year.

However, to be honest it is not the religious connection that interests me, but the taste and specific texture of this lovely bread. Seelen are large, savoury bread rolls sprinkled with caraway seeds and coarse sea salt.  On the inside they are particularly fluffy and moist owing to the use of very soft dough and spelt flour instead of wheat. In the Stuttgart region Seelen are often eaten for breakfast fresh from the bakery. Another popular variation is to eat them as hot sandwiches filled with ham and cheese. Personally, I would describe this bread as the Swabian equivalent to the baguette or ciabatta. I like serving Seelen with vegetable stew or soup especially in the autumn and winter.

This recipe makes about 6 large Seelen

500g white spelt flour
20g fresh yeast (or one sachet dry)
300 ml warm water
2 tsp salt

For sprinkling: caraway seeds and coarse sea salt

Dissolve the yeast in the warm water and knead all ingredients for about 10 minutes to get soft and fairly sticky dough. Leave to rise in a warm place for about 60 minutes. After 20 minutes and 40 minutes of rising knead the dough again briefly with wet hands. 

When the dough has risen turn it out onto a lightly floured wooden board. With wet hands shape it into a square of about 20 cm. Use a wet knife to cut the dough into six strips. Wet the hands again and transfer the strips onto a baking sheet lined with baking paper. Don’t worry if the Seelen at this point look like a sticky mess, this is quite intentional and they will look rustic once baked.  The sticky dough gives the Seelen their distinctive, chewy texture and open crumb. Cover with a clean dish towel and leave to rise for another 20 minutes.

Preheat the oven to about 240 degrees and place a bowl of water on the bottom shelf. 

When the Seelen are ready to go into the oven wet them again with your hands and sprinkle with caraway seeds and coarse sea salt. Bake for about 20 minutes or until golden brown.

24 September 2011

Poppy seed plait - 'Mohnzopf'


Sweetened and plaited breads are popular in Germany – for breakfast at the weekend (or on any other morning of the week if I get the chance), but also with coffee or tea in the afternoon. A favourite variation of mine is this plait filled with a sweet poppy seed mixture. It tastes and looks quite special (even if I say so myself), but it is actually quite easy to make. The poppy seed in the mix can be replaced with ground nuts - hazelnuts and/or almonds are best. Many different variations in flavour are possible with the addition of, for example, grated lemon zest, cinnamon, cocoa powder or even grated marzipan.


Poppy seeds are widely used in cakes and other sweet dishes in Central and Eastern Europe. It is not a problem to buy packets of poppy seed in the UK – I usually get mine from the organic supermarket. Unfortunately, I have never found ground poppy seed as needed for this plait and also for other cakes (such as my poppy seed cake). However, poppy seed can be ground (or at least bruised) in a decent food processor or even with a mortar and pestle). I don’t recommend using whole poppy seed, as this has quite an unpleasant, sandy texture.

I usually bake this plait in a large cake tin (about 30 cm long) to give it an even shape. It can be baked without a tin, but this will result in a flatter shaped loaf.

For the bread:

20 g fresh yeast (or 1 sachet dry)
130 ml milk
400 g plain flour
40 g sugar
70 g butter
1 egg

For the filling:

100 g ground poppy seeds
25 g semolina
60 g sugar
175 ml milk
Seeds of one vanilla pod
A good swig of rum (optional)

Dissolve the fresh yeast in the warm milk, add to the rest of the bread ingredients and knead to get a fairly firm ball of dough. Cover and leave to rise in a warm place for about 45 minutes.

In the meantime make the filling. Boil the milk with the sugar and vanilla, and then add the poppy seeds and semolina. Bring back to the boil briefly and set aside to allow the poppy seed and semolina to swell up and the mixture to cool down. Add the rum and mix well.

When the dough has risen roll it into a rectangle of about 20 by 30 cm. Evenly distribute the topping on the dough and roll up so you end up with a sausage about 30 cm long. Carefully cut this sausage down the middle with a serrated knife. Then twist the two halves into a braid and place in a greased cake tin. Cover and leave to rise again for about 30 minutes.


Bake in a preheated oven at 180 degrees for about 45 minutes.

20 September 2011

Swabian onion tart - 'Zwiebelkuchen'


Zwiebelkuchen is a seasonal dish that can typically be found in the wine-growing regions of south-west Germany in early autumn. It is the perfect accompaniment to new wine, which is unfiltered grape juice in an early stage of fermentation with an alcohol content ranging from four to 11 percent. New wine, also known as Federweisser (white) or Federroter (red), is only available directly from wine producers and for a few weeks in September and October. This drink is traditionally served and consumed in the popular ‘Besenwirtschaften’, or ‘broom taverns’. These taverns are set up in the barns, garages or even living rooms of wine growers in the autumn, when they are allowed by law to serve their produce without a license for a short period of time. Traditionally, a broom is placed outside the building in order to signal that a tavern is open for business. In addition to wine simple savoury snacks are also served and the Zwiebelkuchen is a firm favourite. I have not been able to source new wine in the UK so far, but the tart also goes very well with a glass of chilled Riesling or a light red, such as a young Pinot Noir. It would probably also team up nicely with a good vintage cider!

The recipe below can be baked in a round form or in a rectangular tin. Choose the size of your tin depending on how deep you would like the onion filling to be. I have used a 32 cm tart form in the photo. The tart is best served warm but it also tastes good reheated on the next day.

For the dough:

20g fresh yeast (or 1 sachet dried)
250 g plain flour (you can also use whole wheat or spelt)
1 pinch sugar
1 tsp salt
50 g butter
150 ml warm water

For the filling:

600 g onions
40 g butter
1 tbsp plain flour
2 eggs
100 ml single cream or crème fraiche
Salt
Caraway seeds
80 g bacon lardons

Dissolve the yeast in the warm water and combine with all the other dough ingredients. Knead for a few minutes until you have a smooth and elastic ball. Leave the dough to rise in a covered bowl until it has doubled in size. Line your greased tin with the dough (not too thick, but not as thin as for pizza).

For the filling chop the onions into small squares. Cook slowly in the butter over a medium heat. The onions should become translucent, but they should not turn brown. It is important to take your time with this – make sure the onions are nice and soft.


When the onions are cooked, stir in the flour and leave to cool slightly. Add the cream and eggs and mix well. Season with salt and with some caraway seeds – make sure you taste the mixture as the onions require quite a lot of salt. Pour the filling into the tin and sprinkle with more caraway seeds and the bacon lardons. Dot with some extra butter, if you like. Bake at 200 degrees for 40-50 minutes.

10 September 2011

Pretzels - 'Laugenbrezel'


For those who know Germany (and its baking landscape) my first recipe clearly gives away where I grew up. The Laugenbrezel – a savoury shape baked from yeast dough and with a distinctive brown and chewy crust – can be found mainly in the south of Germany. The best brezels, even if I say so myself, come from the south-west, from Baden-Württemberg (and not from Bavaria!) and particularly from the Stuttgart region. Legend has it that the Laugenbrezel was invented by a baker from Bad Urach, a small town not too far from Stuttgart. Having committed a crime he was sentenced to death by hanging. However, as this was the baker’s first offence the local monarch agreed to give him a last chance: if he succeeded in baking a cake through which the sun could shine three times his life would be spared. The baker went to work and the brezel was the result of his labour.

I love brezels and (apart from my parents) they are what I miss most when I remember Germany. There is only one small complication, which has previously held me back from making my own and homemade version: the distinctive brown and chewy crust of a real brezel can only be achieved properly if it is dunked in a 4% caustic soda solution before baking. Some say that boiling some baking soda in water brings similar results... But this hasn’t made me happy. So finally, on my last trip to Germany, I acquired caustic soda solution in a pharmacy and successfully got the odd-looking bottle covered in hazard signs through Eurostar security... I have not tried to buy food-grade caustic soda in the UK. You might be able to get it from a friendly pharmacist, but I am fairly sure it can also be bought online. You only have to be persistent. It is definitely worth it.


Edit (4th March 2012). A few weeks ago I tried baking the Brezels with a baking soda solution, just because it is so difficult to get the 'proper' caustic soda outside of Swabia. The texture and flavour is not quite the same and they are not quite as shiny, but the result was not too bad. It is certainly better than no Brezels at all! Unlike the caustic soda solution, which is applied cold (indeed, it would be dangerous to heat this up), the baking soda is used with boiling water. Boil 3 tablespoons of baking soda in 2 litres of water for about 10 minutes. Then boil each raw Brezel in this solution for about 20 seconds and leave to drain. Sprinkle with coarse sea salt and bake as below.


This recipe makes about 16-20 medium-sized brezels:

1 kg plain flour (you can also use spelt flour or a mix of both)
35g fresh yeast (or 2 sachets dry)
A pinch of sugar
500 ml lukewarm milk or water or a mix of both (I used half milk, half water)
75 g butter
2 teaspoons salt
coarse sea salt for sprinkling

4% caustic soda solution (about 300 ml)

Dissolve the yeast in the warm liquid and knead all ingredients until you have a firm and relatively dry dough. Leave this to rise in a covered bowl until it has doubled in size (30 minutes to 2 hours).

Divide the dough into 16-20 pieces and roll each piece into a strip around 50 cm long. The centre of the strip should be thicker and the ends should be thin. Form each strip into a brezel shape and leave to rise for a few minutes on a baking sheet covered in baking paper (other shapes, such as oblong rolls, plaits or knots are also possible and typical for this kind of bread. These are also quicker to make).


In order to make the brezels’ bath in the caustic soda solution easier it is best to freeze the unbaked brezels for a few minutes (this makes them easier to handle). Put the caustic soda solution into a large enough plastic food container with a tight-fitting lid. Bathe each brezel in this solution for about 30 seconds (turning once). Make sure to wear rubber gloves and maybe goggles, because ‘unbaked’ the solution should not get in contact with the skin or eyes. I also use metal spoons to dunk and turn the brezels and to retrieve them from the caustic soda. The rest of the solution can be kept with a firm lid on until the next time. Just make sure you label it well and keep it out of children’s reach.


Slit the thick part of the brezel (its ‘belly’) with a sharp knife or razor blade so it can rise and will not split randomly on the sides. Sprinkle with coarse sea salt and bake in the oven at 200 degrees for about 20 minutes (or until the kitchen smells fantastic and the brezels have their typical, dark brown colour).

Enjoy them warm and with some cold, salted butter. They are great for breakfast, lunch, afternoon tea, dinner and as a snack :)

PS: They really should be eaten on the same day, because they go hard quickly. They can be frozen and reheated in the oven, but best results can be achieved if you freeze the brezels before baking and then dunk them in the soda solution whilst still frozen and bake them fresh.